Jeff's model aeroplanesBuilding, repairs & other stuff

2008 Fanfare 2 Laser alignment

Jeff's model aeroplanes»Building, repairs & other stuff
For the roll axis, the fuselage is positioned square  using the motor mounts as a reference, and then the wing is set exactly horizontal. The actual fitting of the wing to the fuselage took all day.
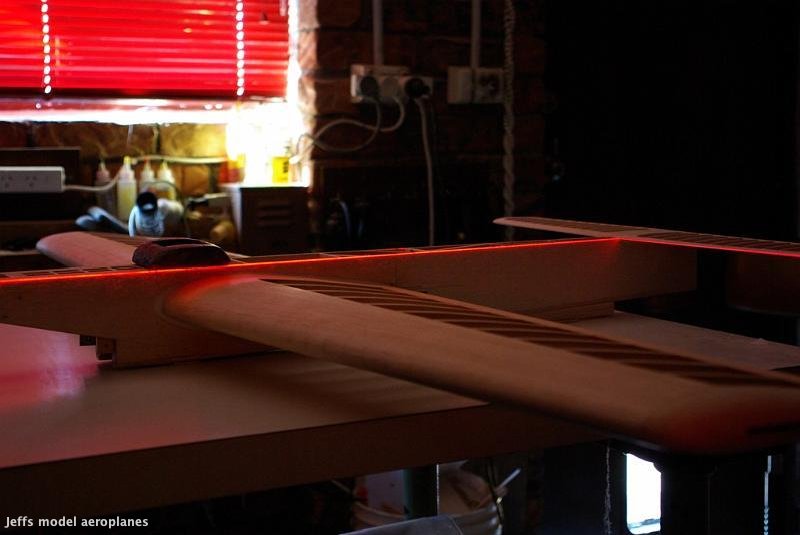
1 For the roll axis, the fuselage is positioned square using the motor mounts as a reference, and then the wing is set exactly horizontal. The actual fitting of the wing to the fuselage took all day.
Checking that there is a small positive incidence in the stab. Now I can fit the top block.
2 Checking that there is a small positive incidence in the stab. Now I can fit the top block.
Now that the fuselage is level, I check that the wing is installed at zero incidence on the pitch axis.
3 Now that the fuselage is level, I check that the wing is installed at zero incidence on the pitch axis.
Now that the wing is square on both axis (and glued in place)  the stab can be set parallel with the wing.
4 Now that the wing is square on both axis (and glued in place) the stab can be set parallel with the wing.
Now that the top block is on, the centre of the fuselage is found and the fuselage secured to the workbench with tape.  (Note: Nowadays I use a fuselage jig during the entire fuselage construction and alignment process).
5 Now that the top block is on, the centre of the fuselage is found and the fuselage secured to the workbench with tape. (Note: Nowadays I use a fuselage jig during the entire fuselage construction and alignment process).
The wing is adjusted with a wedge-shaped block under the wing to bring the stab back to horizontal again.  (With my fuselage jig, i use adjusting screws in each corner of the base to adjust the entire jig to get the stab level.)
6 The wing is adjusted with a wedge-shaped block under the wing to bring the stab back to horizontal again. (With my fuselage jig, i use adjusting screws in each corner of the base to adjust the entire jig to get the stab level.)
The fin can now be set exactly square with the stab and in the exact centre of the fuselage.
7 The fin can now be set exactly square with the stab and in the exact centre of the fuselage.
Checking that the fin is centred on the fuselage.
8 Checking that the fin is centred on the fuselage.
The laser finds its own vertical and horizontal positions as it hangs suspended within its housing. The handle winds the laser up and down.
9 The laser finds its own vertical and horizontal positions as it hangs suspended within its housing. The handle winds the laser up and down.
Note added 2017-01-17.  I now use a fuselage jig adjustable in each corner. The bench itself is fairly flat and aligned L x W with a spirit level.
10 Note added 2017-01-17. I now use a fuselage jig adjustable in each corner. The bench itself is fairly flat and aligned L x W with a spirit level.
I set the top of the fuselage level on the pitch axis by adjusting the rear.  Nowadays, I use a long 2-56 screw in the tailwheel mount to adjust it..
11 I set the top of the fuselage level on the pitch axis by adjusting the rear. Nowadays, I use a long 2-56 screw in the tailwheel mount to adjust it..
 
2010 Building the ThunderbirdNext: 2010 Building the Thunderbird
Create photo gallery websites with jAlbum & TurtleSkin: Turtle Gold, 5.6.7 Download   ·   Help