2019 Building & destroying the Draco RO-Jett 67
 1 2019 Draco 3 Time to start building a new model. It is to be powered by a RO-Jett 61 on pipe and will feature foam wing and stab/elevator construction. |
 2 2019 Draco 3 June 2018: I start by cutting foam blocks to size. I make a jig so that I can accurately burn three holes through the wing core so that later (after sheeting) I can thread a nichrome wire through it to hollow it out. The gas burner heats the bottom of a rod that melts its way through the foam. |
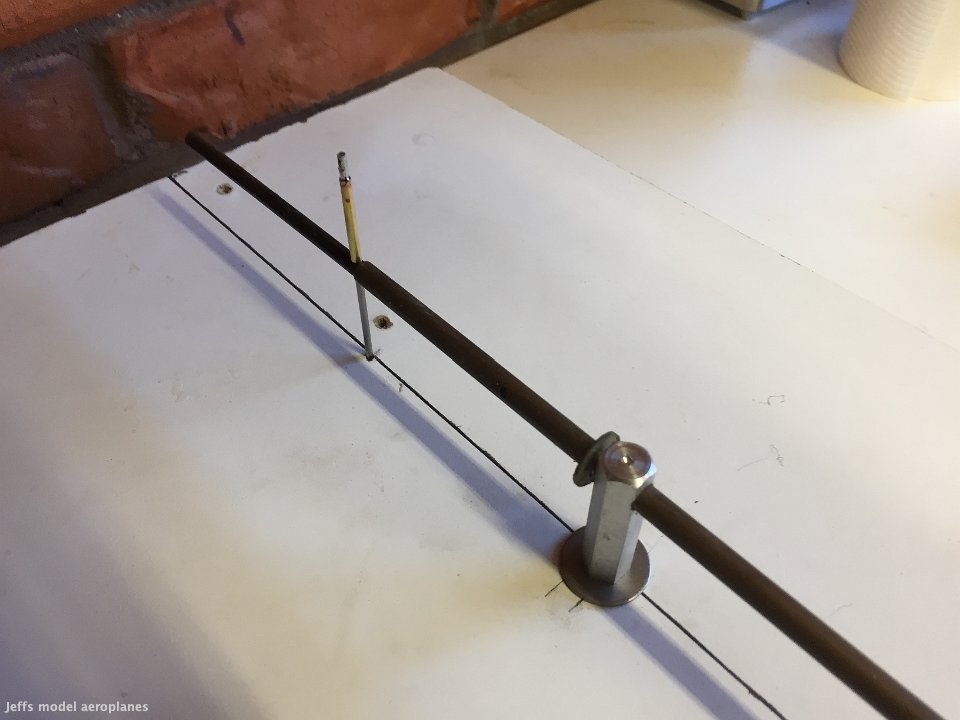 3 2019 Draco 3 A piece of 5/16" rod, that fits inside a brass tube, is held in place with a 3/32" pin. Once the foam core is positioned accurately under the hot rod, I pull the pin and gravity takes over. Fizz, fizz, fizz. |
 4 2019 Draco 3 Both cores turned out OK. Phew! One hole hit its target, the other two missed by a little bit. |
 5 2019 Draco 3 After cutting the wing surfaces, sheeting them and hollowing them out (using the previously burned holes), each core weighed 3½ ounces. |
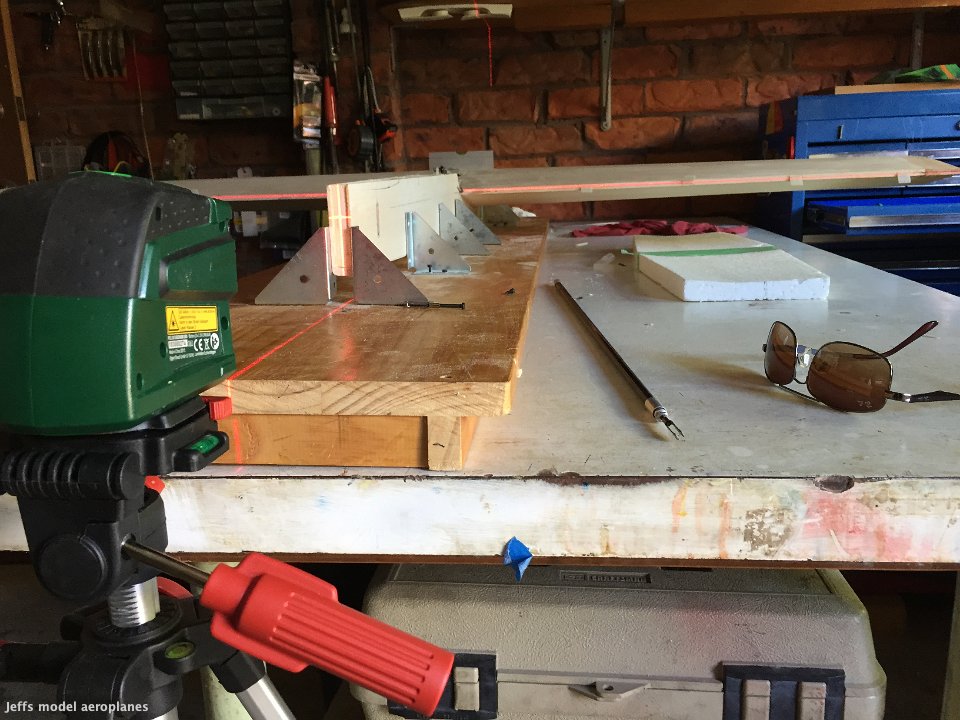
 6 2019 Draco 3 Construction then followed the usual trodden path until February 2019. It is now time to put the wing and tail into the fuselage. I start by aligning the centreline of the fuselage jig with a laser. |
 7 2019 Draco 3 I fit the fuselage into the jig and make sure that the fuselage is horizontal on the roll axis. I have adjusting screws in each corner of the jig to do this. |
 8 2019 Draco 3 I drop the wing in and begin the fitting process. Here, I check that fuselage is horizontal on the pitch axis. This adjustment is via a long 2-56 screw in the tailwheel mount. |
 9 2019 Draco 3 Then begins a long-winded circular trial & error process to get the wing located properly on all three axes. |
 10 2019 Draco 3 Trial fitting the wing on the pitch axis. |
 11 2019 Draco 3 Trial fitting the wing on the roll axis. |
 12 2019 Draco 3 I make a wet mix of West Systems epoxy, slow set hardener and micro-balloons and put the mixture in a glass syringe. |
 13 2019 Draco 3 I then apply the glue to the wing mounts. |
 14 2019 Draco 3 Now things get serious. I fit the wing into the fuselage. I start by aligning the centre of the wing with the centre of the fuselage. |
 15 2019 Tuned Pipe Draco The centre of the wing aligns nicely with the centre of the fuselage. Note the 1/16 copper pin through the carbon fibre pushrod. The ball joint is not Du-Bro - these have a reputation for binding. Instead, I use a 3mm item available from Hobby King in Hong Kong, USA or Australia. |
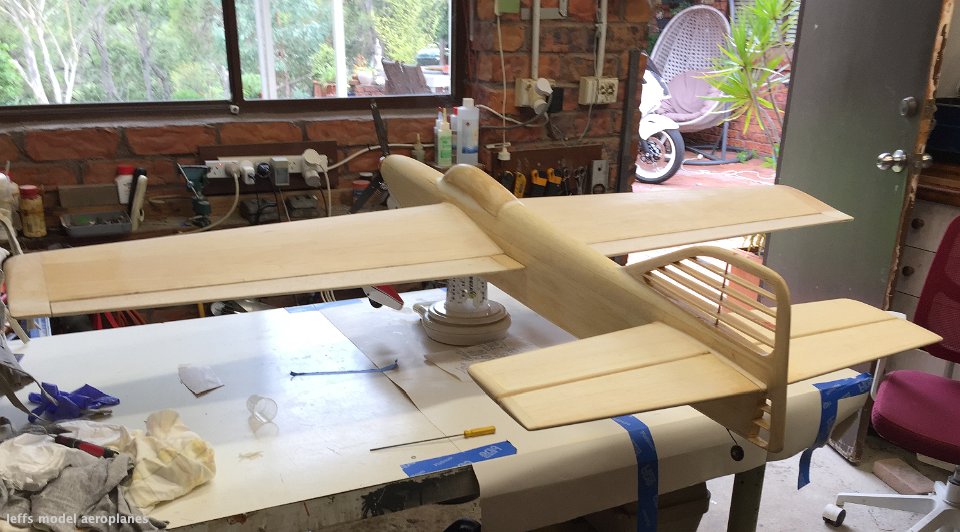
 16 2019 Draco 3 The wing and the stab are glued in, the controls are centred, the top block is on and it's time to fit the fin/rudder. I've finished with the jig and put it away. |
 17 2019 Draco 3 The fin/rudder is set with a laser and spot glued in place. |
 18 2019 Draco 3 Construction is complete. The lower part of the rudder is finished and all of the fillets are on and the whole body is sealed with thinned finishing resin.. |
 19 2019 Draco 3 It's time to put it on the scales to weigh it. |
 20 2019 Draco 3 56 ounces, not too bad. I can save a couple of ounces by removing the wheel pants if necessary. Now for the bit I enjoy: putting the colours on. |
 21 2019 Draco 3 Undercoat from a spray can |
 22 2019 Draco 3 Undercoat sanded off |
 23 2019 Draco 3 Fuselage undercoat completely sanded. Time to remove undercoat from horizontal surfaces |
 24 2019 Draco 3 Sanding undercoat continues |
 25 2019 Draco 3 Time out to build a hard-point handle. This is constructed from two 1mm carbon fibre sections that sandwich the two 1mm steel connection points |
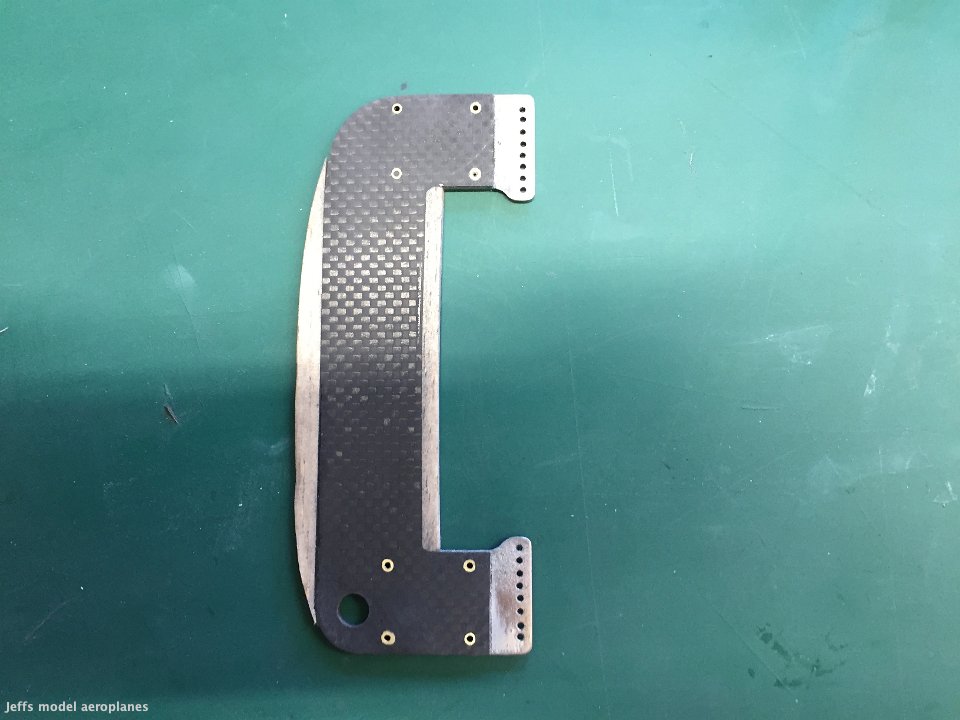 26 2019 Draco 3 Brass rivets tie the lot together |
 27 2019 Draco 3 Complete handle covered in balsa. Total weight 1¼ ounces. |
 28 2019 Draco 3 Picture of fin/rudder. This image goes to Corel Draw to get the correct proportions for the tail graphics. |
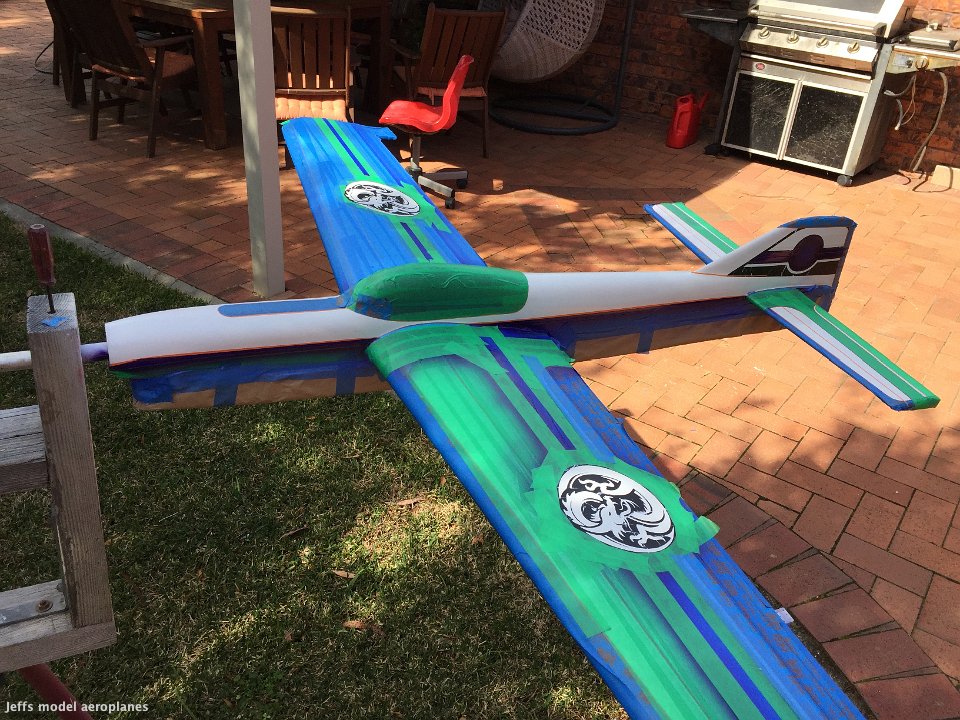
 29 2019 Draco 3 Tail graphics applied. Quite tricky to apply but I've done designs like this a few times now |
 30 2019 Draco 3 Base coat white is automotive paint. Dark silver colour is from a Suzuki motorcycle that I sprayed some time ago. |
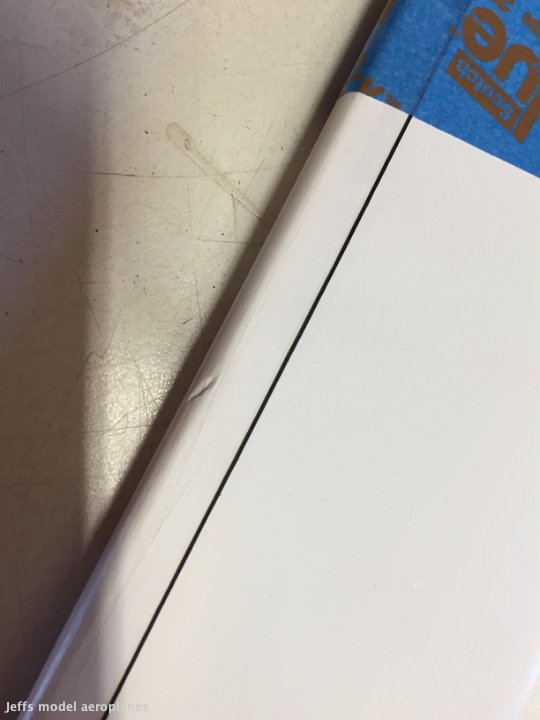
 31 2019 Draco 3 The previous time that I tried this graphics scheme was a miserable failure because I didn't get all of the parallel lines straight. This time, I aligned the trailing edge of the wing with the laser and then lowered the laser for each line. |
 32 2019 Draco 3 This is how it worked. You can see that the pair of lines towards the leading edge is out of wack with the pair aligned with the laser. |
 33 2019 Draco 3 It's then a simple matter to get the opposite wing aligned. Pencil marks are useless and you can see how the rear pencil mark is out about 1-2mm with the laser. |
 34 2019 Draco 3 I tried, really tried, really really tried to draw ink lines on the underside of one of the elevators. In the end I washed it off, repainted it and found another solution. |
 35 2019 Draco 3 This is the solution: 0.4mm (.015") micron tape. |
 36 2019 Draco 3 I experimented with a flap and was very satisfied with the result. |
 37 2019 Draco 3 By now, all of the computer graphics are on, the lettering is on and the "anti-glare" strip in front of the cockpit is on in a matching Suzuki colour. The plane is completely masked waiting for the metallic purple. |
 38 2019 Draco 3 The rear awaits the metallic purple. The numbers in the middle of the graphic are painted and masked off. |
 39 2019 Draco 3 The dragon is on awaiting the metallic gold. |
 40 2019 Draco 3 Metallic purple is on and masked off. The dragon is exposed and awaits the gold paint. |
 41 2019 Draco 3 The dragon is painted and everything is masked off except for the red areas. |
 42 2019 Draco 3 The grand reveal. The red is a Ferrari red. Removing the mask for the tail leaves behind a very sticky, gluey substance. This is not easily removed with glue remover and then washed down with prepsol. There is a small patch where the base white lifted on the fin but this is the only spot on the whole plane where there was any lifting. Pretty good I reckon. |
 43 .2019 Draco 3 I made a mistake with the "anti-glare" strip. I've since repainted this bit and it looks like a new one. The dull red is because I've wet-sanded the two major colours with 2000 wet/dry paper (wet) |
 44 2019 Draco 33 It's 10 October 2019 and finally the "ink" lines are on. |
 45 2019 Draco 3 They're not really ink. They're 0.4 and 0.7mm black tape. They look pretty good I think. |
 46 2019 Draco 3 At the moment, they have a fine coat of clear sprayed on them with an air brush. |
 47 2019 Draco 3 All that's left now is a clean up and to spray the whole plane with clear. |
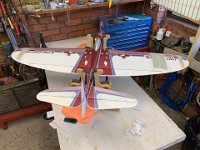
 48 2019 Draco 3 After one year and four months, it's 23rd October 2019 and the plane is finished. |
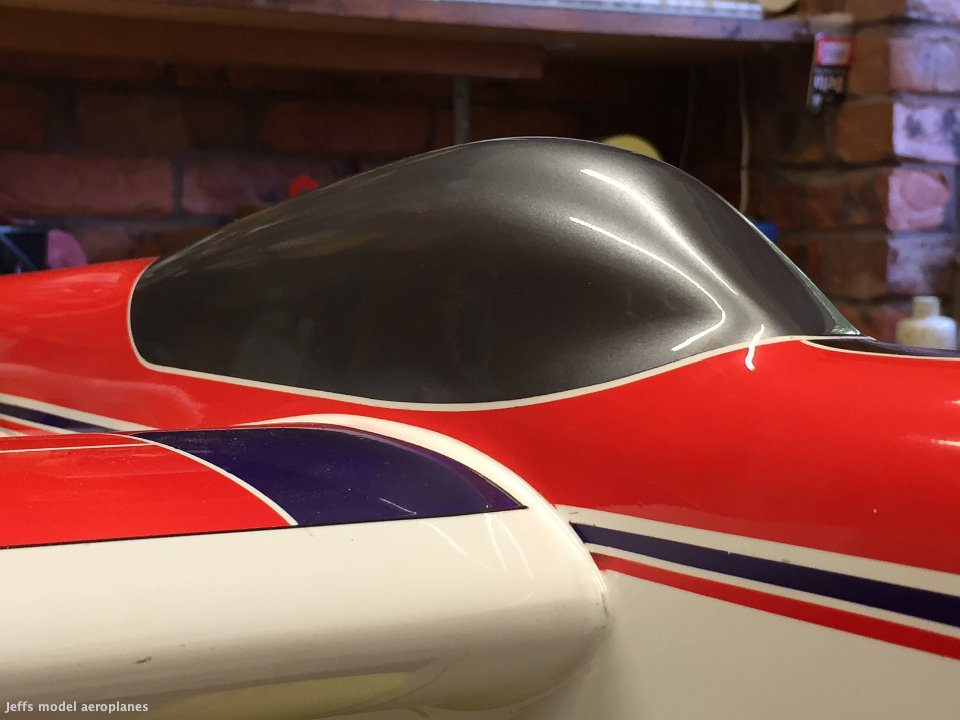 49 2019 Draco 3 The clear went over the cockpit very nicely, not so well in other places like the flaps and elevators. |
 50 2019 Draco 3 The cowl has dual opening air intake ducts that look nice to my eye (looks are important) |
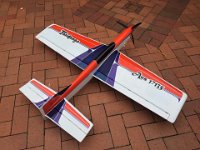
 51 2019 Draco 3 The plane is now ready to fly, with engine, tank, prop, spinner, etc. fitted. Weight is slightly disappointing at 65½ ozs. |
 52 2019 Draco 3 It should fly OK at that weight though. I could remove both wheel pants and bring the weight down to 63 1/2 oz but that's a bit pointless; it's more of a "bragging rights" thing than being useful. |
 53 2019 Draco 3 There is one disappointing aspect to the "ink" lines in that they protrude noticeably above the surface and I don't like this. |
 54 2019 Draco 3 I'd say about the graphics that they are my best design yet. I love the colours and the dragon. About the execution, not perfect. I had lots of tiny pin holes appear after the clear went on in some spots. I'm sure this was the clear reacting with something oil like on the surface. |
 55 2019 Draco 3 When I look back through the planes I've built and featured in this blog, I usually make the comment about next time being perfect. |
 56 2019 Draco 3 Next time: PERFECT. I have a problem getting out to fly nowadays because Grant has crippled feet and Paul has back problems. Maiden flight is planned to be this Saturday 26/10/2019. I'm quietly confident. |
 57 February 01, 2020 RO-Jett 67 Draco 3 An untimely end. The maddening thing was that from November 2019 through to February 2020 Australia had the worst bush fire season that it had ever had and flying was non-existent. |
 58 February 01, 2020 RO-Jett 67 Draco 3 The danger finally passed and we were able to go flying at last. |
 59 2020 RO-Jett 67 Draco 3 Very much like my motorcycle accident, I lost concentration again. I put the control lines on the wrong way around. |
 60 2020 RO-Jett 67 Draco 3 When Paul launched the model, I could not control it. In fact, I thought the lines themselves must have jammed. |
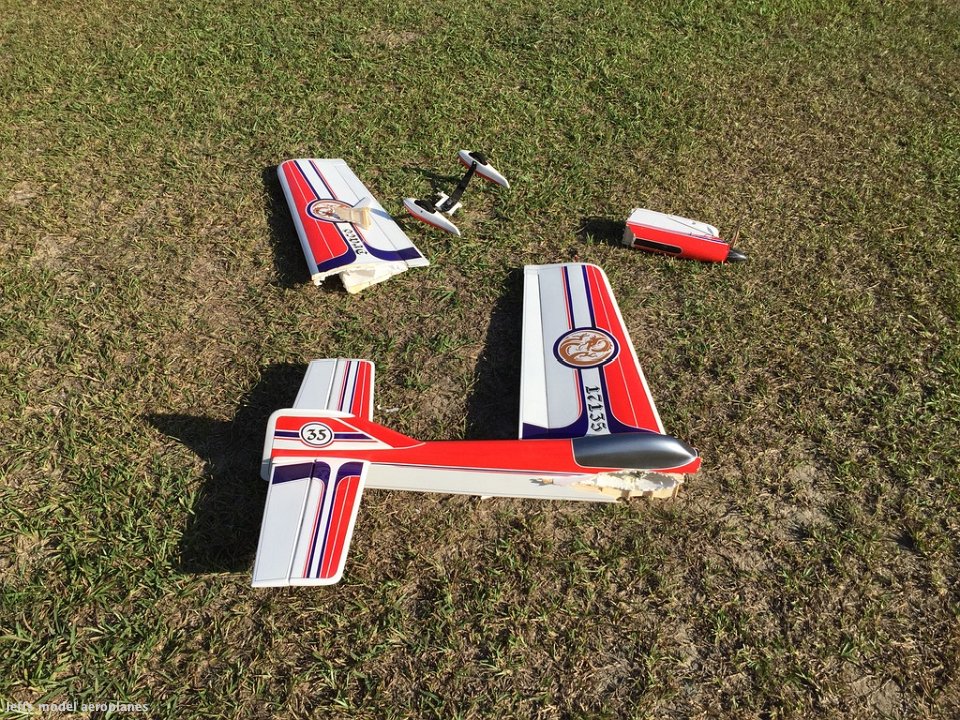
 61 2020 RO-Jett 67 Draco 3 I tried really hard to repair it but it was too far gone. |
 62 2020 RO-Jett 67 Draco 3 I saved the controls, the stab/elevator, the flaps and the wing tips and (with great sorrow) put the rest into the rubbish bin. Return to the home page |