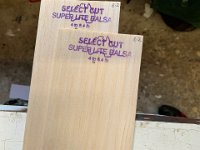
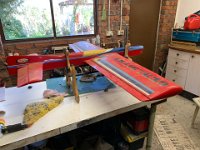
 1 2022-04-19 Fanfare 3 I feel the urge to build another plane. I don't really need another plane but after completing so many planes in the last 47 years, and saying "Next time better" after each one, this time I want to build another one that is better than the previous. |
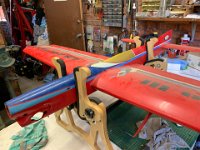 2 2022-04-19 Fanfare 3 I decide that I'll use parts of the plane that I built in San Diego in 1988. The wing and tail should be OK I thought. |
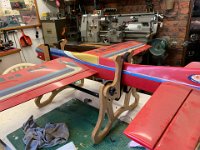 3 2022-04-19 Fanfare 3 This plane is now 34 years old and has been stored in our roof since 1990 when I last flew it in an Oz Nationals. Sentiment stopped me from getting rid of it and I'd kept it as a memento of my years in the U.S.A. |
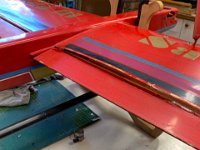 4 2022-04-19 Fanfare 3 Unfortunately, time has taken its toll and the wing is unusable. The tail isn't much better having been snapped in half and rejoined. |
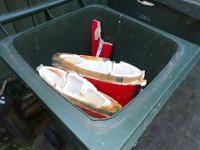 5 2022-04-19 Fanfare 3 Nothing is usable so it goes into the garbage. Even the controls are unusable. |
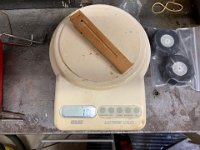 6 2022-05-02 Fanfare 3 I am undecided whether to use the landing gear out of the now departed model or to use my usual fuselage-mounted carbon fibre solution. To help make this decision, I make a land gear block for a wing installation. Ten grams each means 2/3 oz for a pair plus I would need to add a few more grams for the plywood reinforcing of the ribs. |
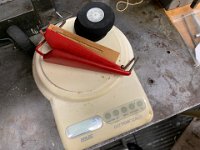 7 2022-05-02 Fanfare 3 With two mounting blocks, using the old 1/8" music wire landing gear is too heavy at over 3 ounces (without wheel pants). |
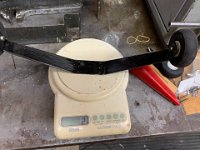 8 2022-05-02 Fanfare 3 A complete fuselage-mounted carbon fibre L/G weighs less. |
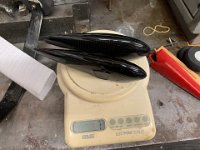 9 2022-05-02 Fanfare 3 So, if I were to add some very light carbon fibre wheel-pants, the weight would be almost identical to using the wing mounted alternative. |
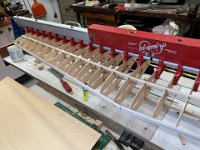 10 2022-05-02 Fanfare 3 I decide to use the C/F landing gear. I have a set of Trivial Pursuit wing-ribs and start by building the wing. This means I need to fill in in the areas of the ribs where the wing mounting blocks would have gone. |
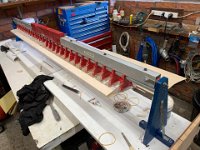 11 2022-05-02 Fanfare 3 I name the new model Fanfare 3. There are a couple of reasons for choosing this name. The first reason is that the name pays tribute to the plane's designer: my good friend of 37 years, Ted Fancher. The second reason is that I already have the graphics available that I used on a previous model of the same name. |
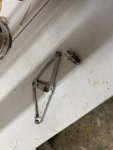 12 2022-05-05 Fanfare 3 I saved the bellcrank from the model that I'd crashed last year (2021). I'd made the centre with small bearings at each end but the engine vibration had hammered the bearings into the alloy and they no longer fitted tight enough to be useful. I push out the old centre and make a new one. The brass bushings and steel shafts in the leadouts are in great condition though and don't need replacing. |
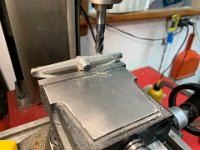 13 2022-05-05 Fanfare 3 I make the new centre much the same as before with a 3/32" I.D. brass bushing up the middle. This time I replace the ball bearings with Delryn bushings. I'm hoping that the Delryn will act like grease seals and keep the lubricant from escaping. |
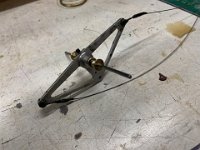 14 2022-05-09 Fanfare 3 I replace the leadouts with new .028" seven strand cable. There is a 2-56 screw in the centre of the bellcrank. This screw serves two purposes: with the screw removed I can force grease into the bearings and after that, the screw also locates the centre on the bellcrank. This is probably a bit of overkill as the centre is a force fit and held with red loctite as well. |
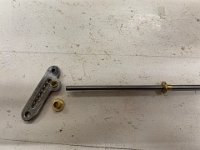 15 2022-05-09 Fanfare 3 I also make a new flap horn to Ted's original specifications (the horn supplied with the kit does not create perfect 90° angles with the front and rear pushrods) |
 16 2022-05-19 Fanfare 3 Time to install the controls. First step is to align the wing front to back and then set the wing horizontal. |
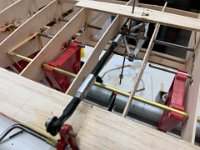 17 2022-05-21 Fanfare 3 Installing the controls. The bellcrank is reversed to make the front line "UP" and is supported top and bottom with 3mm plywood. |
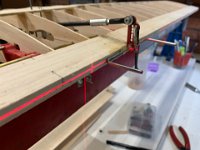 18 2022-05-21 Fanfare 3 The flap horn is adjusted by shortening or lengthening the pushrod |
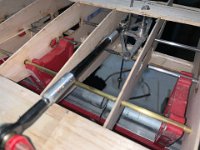 19 2022-05-21 Fanfare 3 A piece of 3/32" steel wire holds the bellcrank in place while the adjustments are made. This is used again later when the flaps and elevators are set in their correct relationship. It holds the bellcrank in its level-flight position while the elevator pushrod is adjusted to length. |
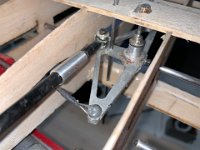 20 2022-05-21 Fanfare 3 A copper pin holds the the 3mm ball joint and the internal sleeve securely in the pushrod. I don't rely on epoxy alone. A further shield slides over the C/F in case it decides to split. |
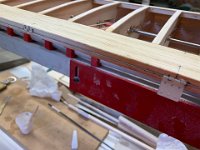 21 2022-07-11 Fanfare 3 The rib caps are on and I've never tried this before: I take the hinges apart and align them along their length with a bit of spring steel wire. |
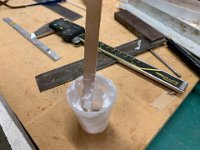 22 2022-07-11 Fanfare 3 For many years I've used thixotropic epoxy to glue the hinges in. I mix silica powder in with epoxy to get the consistency I need. |
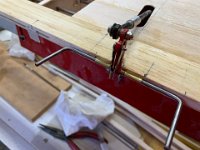 23 2022-07-11 Fanfare 3 Closeup of the controls and the drying hinges. I also treat the rear of the wing with thinned epoxy. |
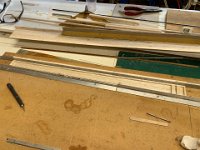 24 2022-05-19 Fanfare 3 In the flap jig. Quarter-grain 3/8" or 1/4" for the flaps is impossible to find. I do however find some quarter grain 1/16" that I can use top and bottom of built-up flaps. |
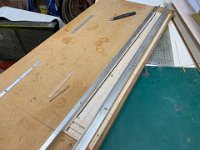 25 2022-05-19 Fanfare 3 I put a thin strip of carbon fibre along the trailing edge to help it stay straight. I also make the L.E with the hinges slotted out on the mill. I glue the L.E. to the flap in the jig later on. |
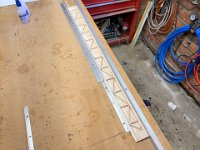 26 2022-07-17 Fanfare 3 Time to start building the outboard flap. The ribs and diagonal bracing is very light 2mm balsa. |
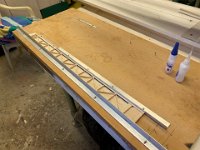 27 2022-07-17 Fanfare 3 Once again, I add a vertical c/f strip to the trailing edge. |
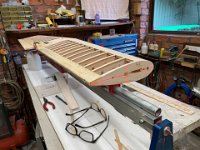 28 2022-07-19 Fanfare 3 I align the wing along its pitch and roll axes . . . |
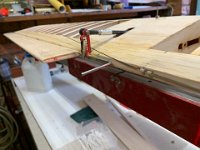 29 2022-07-19 Fanfare 3 . . . and check that the completed inboard flap aligns with the flap horn. |
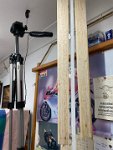 30 2022-07-25 Fanfare 3 I brush thinned epoxy onto each flap and hang them vertically where they will remain for the next few months. Treating the flaps now may help to prevent their warping over time (maybe). |
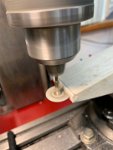 31 2022-08-10 Fanfare 3 Now for the wing tip blocks. I mill a slot for the outboard wing tip T.E. An extension will be glued in and set with the laser after the wing is installed in the fuselage. |
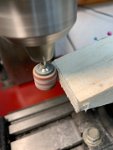 32 2022-08-10 Fanfare 3 I also mill the T.E. square. |
 33 2022-08-10 Fanfare 3 Just for fun, I make an aluminium wing tip weight box . . . |
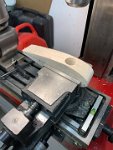 34 2022-08-10 Fanfare 3 . . . and bore a hole in the wing tip. This is supposed to be the outboard wing tip and the hole comes into the top and not the bottom. Bugger! Easily plugged and redrilled. |
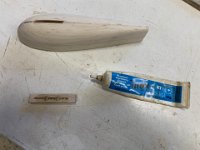 35 2022-08-16 Fanfare 3 Inboard wing tip is complete. I grease the sliding bits so that paint won't affect it. |
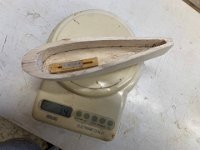 36 2022-08-16 Fanfare 3 Half an ounce. Pretty good. |
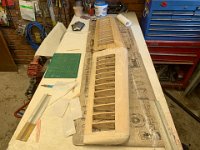 37 2022-08-22 Fanfare 3 I mix talc with thinned epoxy and paint the entire wing wth it. See the original weight box hole? |
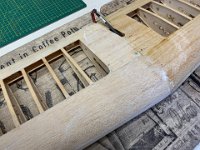 38 2022-08-22 Fanfare 3 It sands remarkably well. The wing is a bit on the heavy side at 13½ ounces but this includes 1oz wing tip weight. |
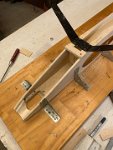 39 2022-09-23 Fanfare 3 I fit the carbon fibre landing gear. |
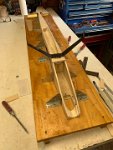 40 2022-09-23 Fanfare 3 Ian Heath from Queensland makes the C/F landing gear. He does extremely nice work. |
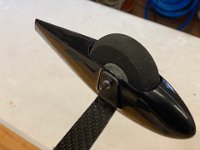 41 2022-09-23 Fanfare 3 The wheel pants are quite small but beautifully made. It cost $100 for the pair but they weigh only 14 grams each. I also want to fit large diameter wheels into a small opening. |
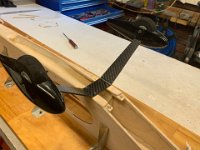 42 2022-09-23 Fanfare 3 During this period of high activity, I also fit the wheel pants. |
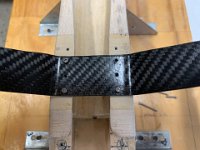 43 2022-09-23 Fanfare 3 The landing gear has a series of different holes to adjust for either grass or pavement flying circles. Correct position is important to reduce the bounce on landing. Too far back and the plane will nose over as it rolls to a stop so it's all a compromise. |
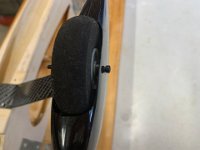 44 2022-09-23 Fanfare 3 It is very important to get the axle holes aligned perfectly and this is a FAIL - extensive rework is required. It is also important to get the wheels aligned centrally and this required drilling out the wheel hubs and the machining of specially sized inserts. The axles themselves are very long 4-40 screws. |
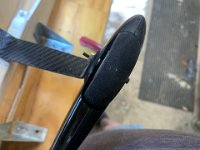 45 2022-09-23 Fanfare 3 It takes a long time to fit these wheels because I want the two 4-40 nuts to clamp the wheel pants to the C/F landing gear. You can just see the nut on the inside edge of the wheel in this picture. To stop the pants from rotating, I'll use some double-sided tape at a later date (after paint) |
 46 2022-09-23 Fanfare 3 I fit the engine with the header attached. With the down-thrust and right-thrust machined into the engine mounts, the tuned pipe header is too far out of alignment. |
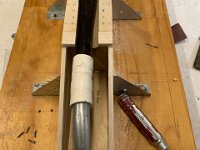 47 2022-09-23 Fanfare 3 It's bloody awful and I decide to fix this (somehow) later. I have no idea right now but David Fitzgerald tells me he bends the 19 mm aluminium header pipe to fix the same problem. |
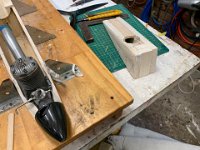 48 2022-10-21 Fanfare 3 I start work on the cowl. It looks pretty ordinary right now. |
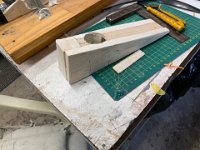 49 2022-10-21 Fanfare 3 The balsa for the cowl is incredibly light, about 5 lb/c ft. |
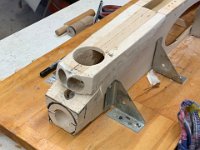 50 2022-10-26 Fanfare 3 Work begins by adding two round intake ports. These ports are made from water-soaked .05mm (about .020") 3 ply wrapped around a mandrel. I make the mandrel to exactly the right size by machining a piece of aluminium bar to the size I want. |
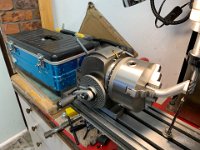 51 2022-11-07 Fanfare 3 After long consideration, I decide to use my indexing head to machine the exhaust header so that it aligns properly with the fuselage centre. I start with an old header just in case. |
 52 2022-11-07 Fanfare 3 I've put the complete machining operation under the "In the workshop" web site. |
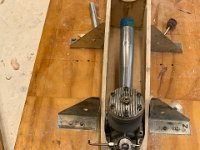 53 2022-11-07 Fanfare 3 It's better aligned now. |
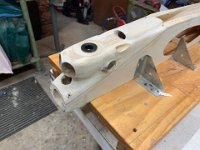 54 2022-11-21 Fanfare 3 The cowl is completely finished. I started working on this exactly one month ago and I've worked on it most days during that time. I pretty much don't like the smaller vent pipes but I leave them alone. |
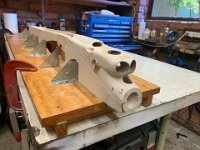 55 2022-11-21 Fanfare 3 because of the tuned pipe, I've added an extra vent to cool the header. Overkill? Probably. |
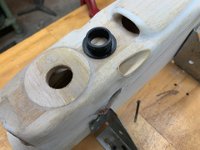 56 2022-11-21 Fanfare 3 I make a Delryn plug to protect the cowl from the glow plug clip. I'll glue this in once the painting is complete. |
 57 2022-11-22 Fanfare 3 Last night, I brushed on a coat of epoxy/talc on the cowl and today I do some quick sanding. It feels great to the touch. |
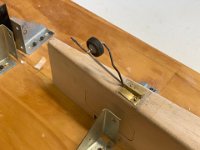 58 2022-11-23 Fanfare 3 During this period, I complete the tail wheel and self-launcher. |
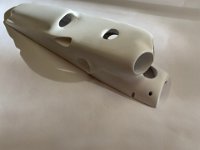 59 2023-01-13 Fanfare 3 Happy New Year. Cowl is completely finished. It's finished in 2K white and I've taken the shine off with 1200. |
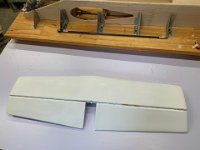 60 2023-01-30 Fanfare 3 Rear stab and elevator are also painted in 2K, wet sanded with 1200. |
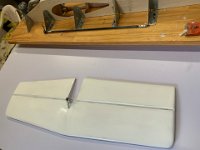 61 2023-01-30 Fanfare 3 I've sanded a bit too much along some edges. This is OK, I'll touch it up when I spray the assembled plane. |
 62 2023-01-30 Fanfare 3 I've also painted the flaps. This isn't as good as I want so I'll wet sand with 1200 and finish them again later. The spinner is undercoated in 2K primer and ready for 2K Red. |
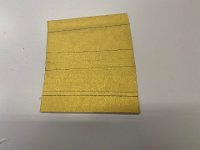 63 2023-01-30 Fanfare 3 Time to start making the tank. I cut a template out of cardboard and lay this on some tinplate. I leave plenty of excess on the tinplate at both ends. |
 64 2023-02-11 Fanfare 3 I use my handy-dandy bender to form the tank. I don't try to allow for the thickness of the tinplate but treat it as though it doesn't matter (which of course it does). |
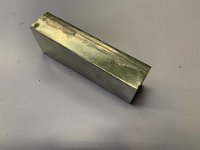 65 2023-02-11 Fanfare 3 I allow plenty of length when I cut the tinplate. This tank is wedge-shaped and (because of the tinplate thickness) the wooden former doesn't go all the way in. But I have plenty of overhang so it is a simple matter to cut the excess away on both ends. |
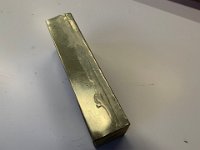 66 2023-01-30 Fanfare 3 The soldering is technically adequate even if it looks a bit rough. |
 67 2023-02-11 Fanfare 3 The tank fits nicely; now to add some plumbing. |
 68 2023-03-18 Dave Fitzgerald is in town so we go flying. The idea was that he would test fly and trim my latest model. And what happens is . . . |
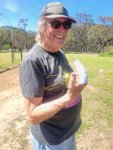 69 2023-03-18 . . . I stick my hand in the prop. |
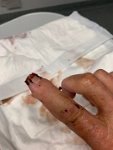 70 2023-03-18 Fanfare 3 So Dave gets to spend seven hours in the emergency ward. |
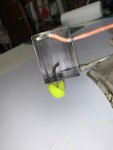 71 2023-04-14 Fanfare 3 After a few weeks healing, I return to the tank. All of the copper tubing is installed. The tubing is 3.5mm O.D. compared with the usual 3.2mm O.D. of the 1/8" tubing. The I.D of the smaller tubing is .0635" and the I.D of the larger tubing is .0935" - this is 30 thou bigger (or 0.7mm) |
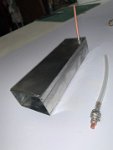 72 2023-04-14 Fanfare 3 This is the heavy "clunk" from the clunk tank. The plastic tubing is 3mm I.D. which is much larger than my previous tanks that were about 2mm.As this tank is going to supply lots of fuel to a K77 on pipe, Dave suggests all tubing needs to be the next size up. |
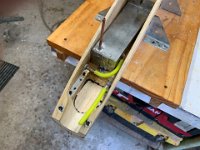 73 2023-04-26 Fanfare 3 Tank is installed and fill/vent is installed |
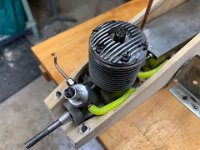 74 2023-04-26 Fanfare 3 Everything fits. Just. A K77 takes up a lot of room. I also test-fit the cowl to make sure everything works as it should.This takes me a long time to finish because it's one of the jobs I seriously dislike. |
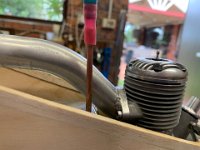 75 2023-04-26 Fanfare 3 Phew! The header just clears the tank. |
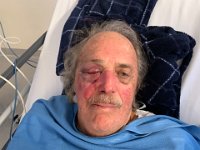 76 2023-05-15 Fanfare 3 I'm back to doing stupid things again. I fall while putting my jeans on and land on my eye. Back to the emergency ward again. |
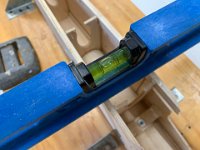 77 2023-08-14 Fanfare 3 It takes three months before I can return to the workshop. I decide it is time to instal the wing. This is checking that the fuselage is level in the jig. |
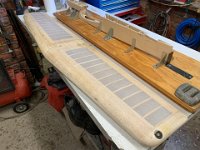 78 2023-08-14 Fanfare 3 The wing has a slight bend in it so I cover and dope one side in the hope that it will bend back again. |
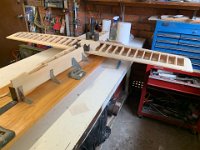 79 2023-08-13 Fanfare 3 Things don't look promising right now. The wing is not straight. |
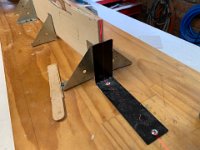 80 2023-08-14 Fanfare 3 I persist with installing the wing and convince myself the wing is not so bad really. The fuselage is vertical and straight. |
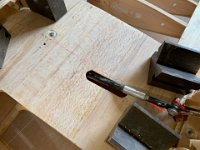 81 2023-08-14 Fanfare 3 Wing is installed but only tack-glued in place. Fortunately. |
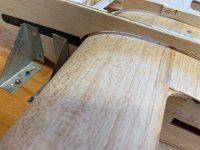 82 2023-08-14 Fanfare 3 Richard Field built the fuselage from a kit; the wing cutouts, laser cut, are horrible. |
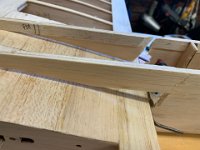 83 2023-08-17 Fanfare 3 What the . . . ? This piece is way too short. |
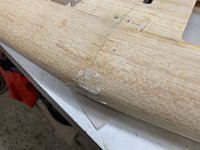 84 2023-04-26 Fanfare 3 The fuselage has warped like a banana. I hastily remove the wing. |
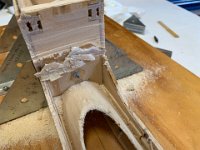 85 2023-08-17 Fanfare 3 It's a mess to get the wing out. I'm left with no option but to build a new fuselage. |
